
Here I give a short insight in my roasting setup, detailing how I connected my Huky 500T using VINT Phidgets and some custom electronics to Artisan.
by Philipp Schmidt
The Plan
My goal was to automate the Huky as much as possible, but with as little effort as necessary.
Since the fan has high impact on the environmental temperatures (ET) on this machine, and thus indirectly on the bean temperature (BT), I decided to get started by take control of it first. That way, I could avoid to change the gas stove's needle valve for a proportional control valve or to automate the installed one.
The Fan
First, I replaced the Huky's original AC fan by a powerful 12V DC fan. I have selected the Noctua NF-A14 industrialPPC-3000 PWM. Note that this fan (like many others) has a separate PWM input, which is essential for my further setup. I also 3D-printed two adapters to be able to mount that new fan to the original vent-bowl.

Adding Control
I wanted to control the fan via Artisan besides the possibility to record ET and BT. Since version 1.2 Artisan supports the new VINT-Phidgets. This drew my attention to the VINT HUB0000 and its possibility to connect several Phidgets, one for each of my needs. I have selected the VINT TMP1101 for reading the temperatures and the VINT OUT1000 for controlling the fan.

This setup enabled me to display the temperature readings in Artisan and controlling an output voltage of 0 - 4.2V utilising Artisan's buttons and sliders. See the Artisan setup at the end of this post.
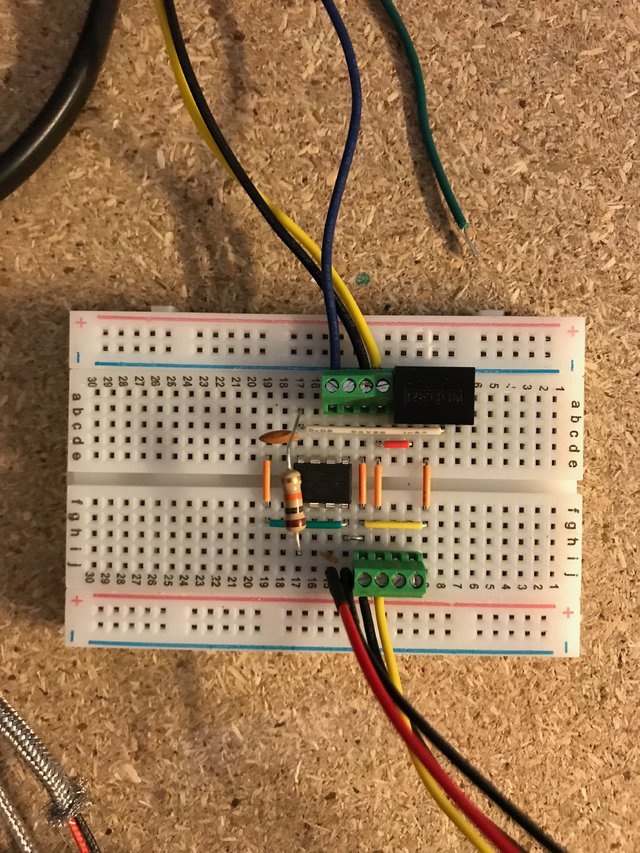
Signal Massaging
After some research, the simplest option I found was to build a little circuit around an ATtiny85 MCU. That setup reads the incoming voltage and converts it to the required PWM-Signal and powers the 12V fan. The MCU itself is powered by 5V stemming from a step down regulator, which takes the same 12V as the fan (you could also use any 7805 IC here). As I'm not an electrician and this is virtually my first ever self-made circuit, I kept everything very simple and stripped-down.
Artisan Setup
In a final step I configured Artisan to read the temperatures and to control the fan. This is easily done by selecting the TMP1101 under menu Extras >> Devices >> ET/BT and by creating a slider with the following settings.

The Action is set to VOUT Command and the Command is out(n,{}) with n set to the channel 0 in my case. Factor is set to 0.04, since the maximum output is 100 * 0.04 = 4.0 Volts.
In a perfect world it should be 0.042, as the OUT1000 outputs 4.2 Volts max, but Artisan only supports 2 decimals here. UPDATE: v1.3.1 will support more digits here!

I also created a bunch of buttons to set the slider to some pre-configured values, e.g. Off, 60%, 80%, 100% (this range works quite well for me). Syntax is the same as for the slider.

The fan and therefore convection has a high impact on the Huky's ET. Thus the above setup can easily be used with Artisan's software PID to hold a certain temperature, e.g. for warming up the whole roaster or in between roasts.
This is just one approach on how you can utilize the new support for VINT hardware from Phidgets. It keeps the necessary cable-connections reduced to a minimum and offers many more thinkable setups.
Closing
Further information on this project, the STL-Objects for 3D-printing, Fritzing-Files for the circuit and the ATtiny-Code can be found in my repository on GitHub.